The adventure begins..
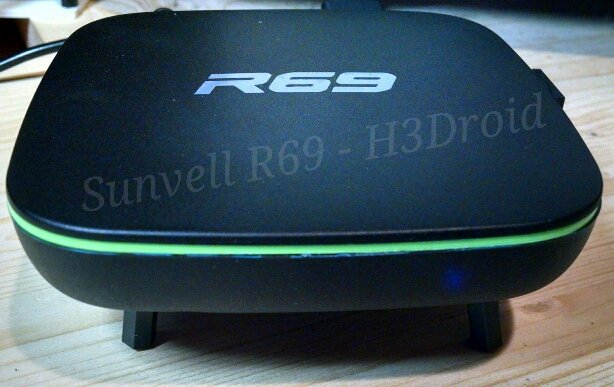
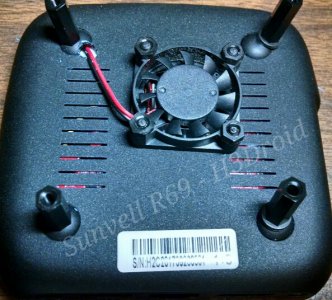
So, I saw this little guy on Gearbest for $20.00 over the holidays and figured since it had an H2 I would give it a try and see how well it would run H3Droid and if it would make a useful Android / TV Box. Now, the picture below is not how it actually comes from the manufacturer, what you are seeing is my final creation (with legs) in all its glory:
I present to you the Sunvell R69:
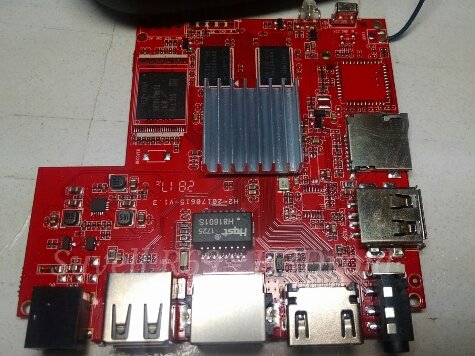
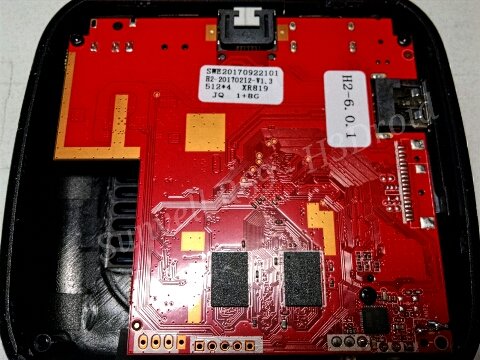
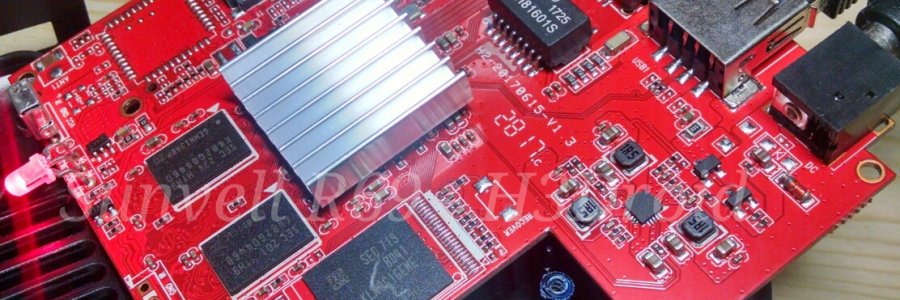
Now, it is important to note that the Sunvell R69 is indeed a cheaply manufactured TV Box, so you get what you pay for. In this case, the board does not have a voltage regulator, so is permanently stuck running at 1.2v, this results in a VERY hot SoC under any type of stressful use. It appears, to get around this extra heat issue, that instead of providing a fan, when designinging their TV Box Android version they decided to cheat the customer a bit by setting really low thermal trip points for killing off CPU cores. You don't really get to use the whole SoC because 90% of the time 3 out of 4 cores are effectively disabled because of the heat issues generated from the constant voltage and poor passive air flow in the case. When starting to test H3Droid you could tell almost immediatly that this was the case because instantly temperatures reported by the SoC were around 80-90c under any type of stress (average running temps for H2+ / H3 should be between 30c (idle) to 70c (full stress)) which is entirely too hot to run the SoC at for long periods.
Once I saw the poor thermal regulation, instead of cheating H3Droid in the same way, by setting low cpu throttle temps in DVFS, I pushed forwards adding a fan to the unit and eventually the feet that you see on it (originally it sits much lower and only has small nubs for feet).
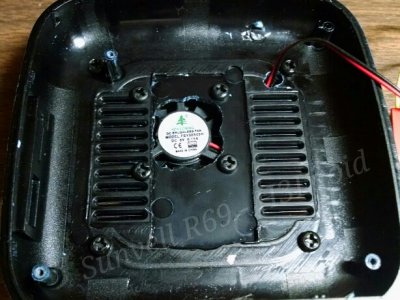
The fan I chose for this can be found on ebay for $3.99 with free shipping from Hong Kong ( http://r.ebay.com/1qJzG3 ). I ended up soldering the fan power to the main power for the board to supply it with power, shown above covered by electrical tape to secure things to the board (do note this likely not the best/safest way to do this, but it works). Additionally, I fashioned the feet and attached the fan with M3 nylon hex spacers and screws which I also purchased from ebay for around $10.00 at the time ( http://r.ebay.com/Xf5fCu ). All in, I spent about $35.00 after shipping costs for all the items I put into this project. It may be important to note, that since I first did this around the holidays, the Sunvell R69 has gone up in price to around $27.00 on Gearbest (the last time I checked) and the nylon screw set has also increased in cost some (you may be able to find a different set for less), so the cost of replicating this project may be a bit more now than my original budget.
Before adding the fan, my max temperatures under stress tests exceeded 90c in some cases and idle was generally around 50c. Post installation of the fan and feet to raise the unit up enough to allow good airflow, I was seeing temperatures at 36c-38c idle and 58c-60c max under stress. The overall responsivenes of the box also increased drastically once running at optimal temperatures compared to without the fan when it would be constantly overheating.
So, to get down to the nitty gritty, is the Sunvell R69 really worth all of this hassel?
The answer to this question will vary based on your budget and interest in the device. In addition to being a H2+ and only running at 1Ghz per core constantly because of the fixed voltage regulation, it seems they cheaped on the RAM they used and chose a slower module than you would find on most other H3/H2+ devices. This results in the unit not being able to handle true 1080p because the memory is not fast enough to handle CPU/GPU assited rendering. While you can boot the board in 1080p and it will 'run', the experience will be extremely glitchy and in some cases may become unsuable as things heat up. You will see noticable glitching when playing back 1080p content as well. As such, it is recommended to run the Sunvell R69 in 720p mode instead. It is interesting to note that in the originally provided Android version on the Sunvell R69 that they also faked 1080p mode, while the option was available from the Android menu it would still run with the 720p framebuffer and show surfaceflinger (desktop) in 720p as well, even when set to 1080p and your display shows it is in 1080p mode. So this device was probably never really meant to be a full fledged 1080p TV Box and instead was always meant by design to run in 720p.
It is worth mentioning that the kit does come with a nec compatible remote which is fully compatible with H3Droid. Hopefully later I will complete a keymap and post a link / some directions for it. In the meantime if you have one and have problems figuring it out from our F.A.Q. then just drop on by our IRC channel and we will be happy to help!
If someone decides they wish to embark on a simiilar adventure, there are some hacks to make it work with 1080p 'kinda' at least without as much glitching, however, because this is not something for a novice to be messing with, I am not going to include it here. If you reach a point where this is something important to you, I would instead invite you to visit on IRC and we can discuss what is needed.
Till next time H3Droid fans, remember... it may not be purrrfect, but it's better!
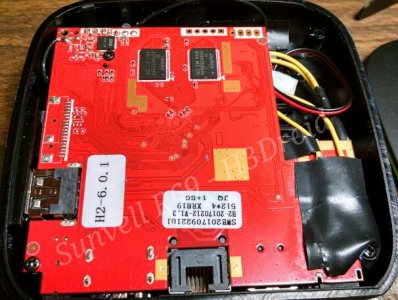
Specficiations of the Sunvell R69:
- Brand: Sunvell
- Model: R69
- Core: Quad Core
- CPU: ARM Cortex-A7 (Allwinner H2)
- GPU: Mali400MP2
- DDR3 RAM: 1G
- eMMc: 8GB
- HDMI Version: 1.4
- RJ45 Port Speed: 100Mbit
- WiFi Chip: XR819
Link to 5v Fan
Link to M3 Nylon Spacers and Screws
Link to Sunvell R69 at Gearbest
Sunvell R69 Remote Control Keymap:
Add to /data/rc.local: modprobe sunxi-ir-rx; rmmod sunxi-ir-rx; modprobe sunxi-ir-rx;
Keymap File: /system/usr/keylayout/sunxi-ir.klkey 67 SETTINGS
key 65 MUTE
key 1 0
key 66 BACK
key 70 7
key 5 8
key 4 9
key 74 4
key 9 5
key 8 6
key 78 1
key 13 2
key 12 3
key 76 INFO
key 26 DPAD_DOWN
key 80 DPAD_RIGHT
key 81 DPAD_LEFT
key 22 DPAD_UP
key 19 DPAD_CENTER
key 25 BACK
key 17 HOME
key 15 BROWSER
key 16 VOLUME_DOWN
key 24 VOLUME_UP
key 40 POWER WAKE
Additional resources: